Rock Mining Bucket A Step-by-Step Guide to Adventures with Kids
May
Rock mining buckets offer a unique opportunity for children and parents to embark on a thrilling treasure hunt, all while learning about geology and the natural world. These specially curated buckets are filled with an assortment of rocks, minerals, and fossils, waiting to be discovered by curious little hands. In this step-by-step guide, we’ll walk you through the process of using a rock mining bucket with your kids, ensuring a fun, educational, and memorable experience for the whole family.
Step 1: Gather Your Materials
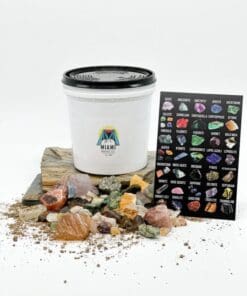
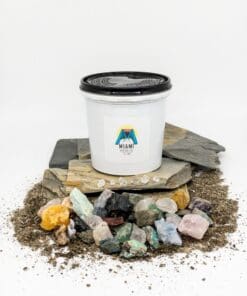
Rock Mining Bucket Contents
Before you begin, make sure you have everything you need for a successful rock mining adventure. A typical rock mining bucket may include:
- A mix of rocks, minerals, and fossils: These treasures will be hidden within the material in the bucket, waiting to be discovered.
- Mining tools: Most rock mining buckets come with tools like sieves, brushes, and magnifying glasses to help your young geologists uncover their hidden gems.
Additional Supplies
In addition to the contents of the rock mining bucket, you might also need:
- A container or tray: This will hold the rocks and minerals as they’re discovered.
- A towel or newspaper: This will protect surfaces and make for easy cleanup.
- A reference guide or book: Having a guide about rocks and minerals can help your kids identify and learn more about their discoveries.
-
Product on sale
 Crystal Mining Bucket 3 POUNDS of Fun: Explore Earth’s Treasures with Hidden Gems & Crystals!Original price was: $35.$25Current price is: $25.
Step 2: Set Up Your Workspace
Choose a suitable area for your rock mining adventure, ensuring there’s enough space for everyone to work comfortably. A table or countertop with a hard, flat surface is ideal. Spread the towel or newspaper over the work area to catch any debris and make cleanup a breeze.
Step 3: Begin the Excavation Process
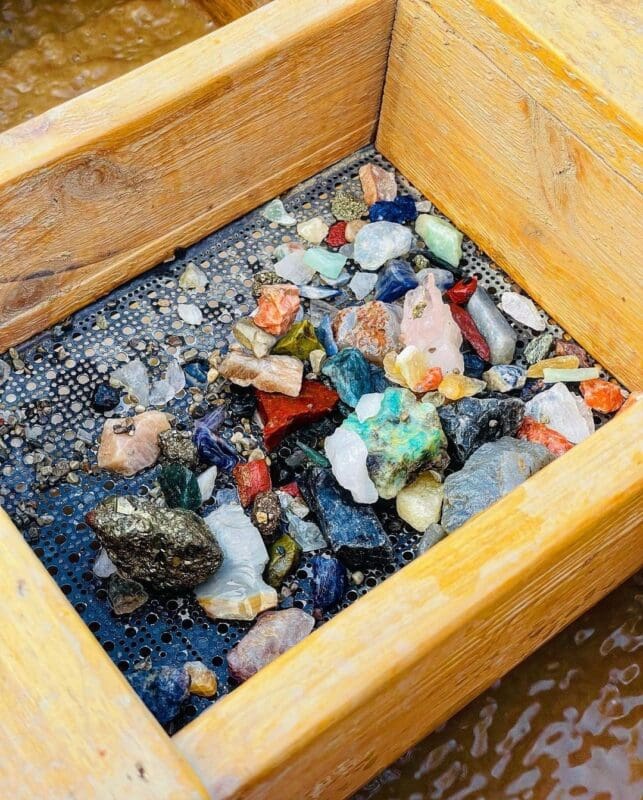
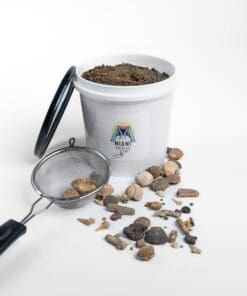
Sifting Through the Material
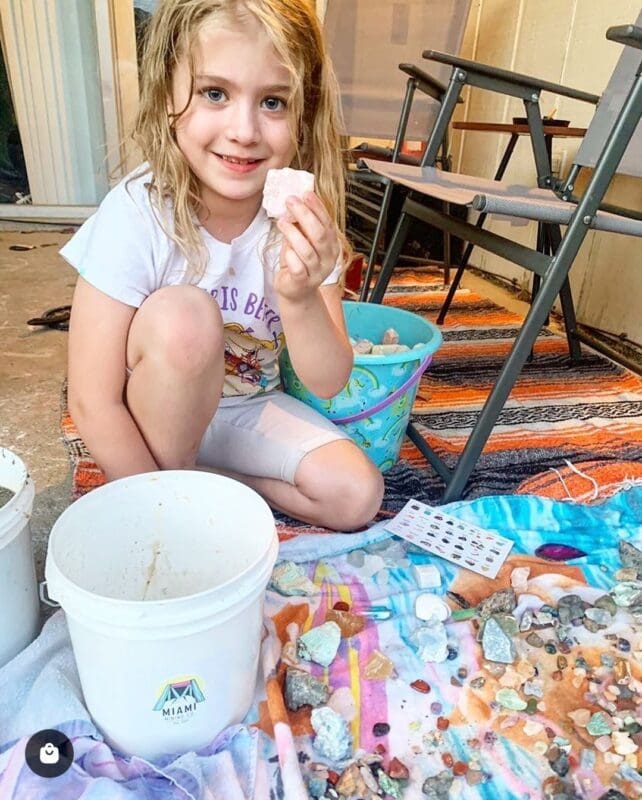
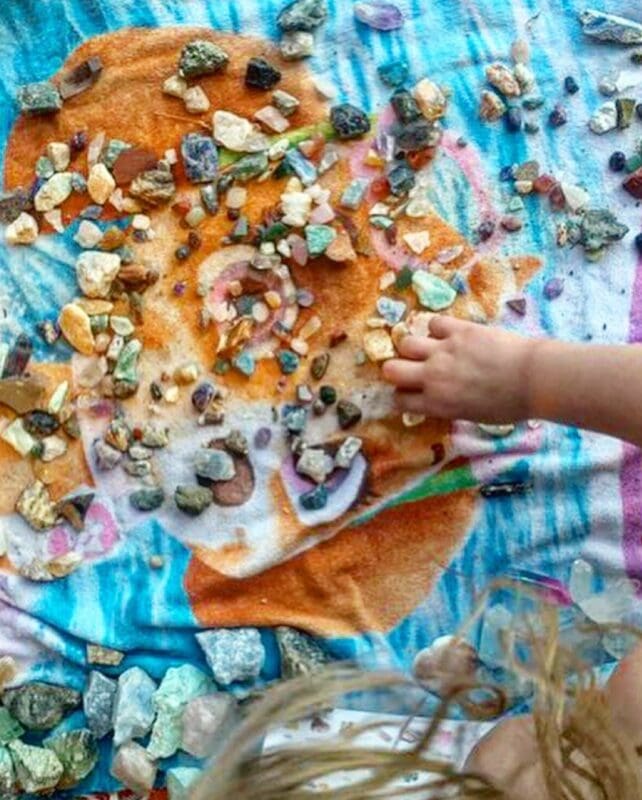
Now it’s time to dive into the rock mining bucket and start uncovering hidden treasures. Pour the contents of the bucket into a container or tray, spreading it out evenly. Show your kids how to use the sieve to sift through the material, separating the rocks and minerals from the surrounding dirt or sand.
Brushing and Examining
As your children uncover rocks and minerals, encourage them to use the brush to gently clean off any remaining debris. Then, have them examine their discoveries with a magnifying glass, taking note of the different colors, shapes, and textures. This is a great opportunity to consult your reference guide or book and learn more about the properties and formation of the rocks and minerals they’ve found.
Step 4: Identify and Learn About the Discoveries
As your kids uncover various rocks, minerals, and fossils, take the time to identify and discuss each one. Talk about:
- The names and characteristics of the discoveries: Use your reference guide or book to help identify the rocks and minerals, and discuss their unique properties.
- The geological processes that formed the rocks and minerals: Explain how different types of rocks are formed, such as igneous, sedimentary, and metamorphic rocks, and how minerals grow within them.
Step 5: Engage in Creative and Educational Activities
Once your kids have finished their rock mining adventure, encourage them to engage in activities that will further their learning and creativity:
- Art projects: Have them draw or paint their favorite discoveries, or create a collage using pictures from your reference guide or book.
- Display creation: Work together to design and build a display for their newfound treasures, allowing them to showcase their discoveries and share their knowledge with others.
- Research: Encourage your kids to research more about their favorite rocks and minerals, fostering a deeper understanding and appreciation for geology and the natural world.
Step 6: Clean Up and Store Your Discoveries
After a successful rock mining adventure, it’s essential to clean up and store your discoveries properly.
- Cleanup: Remove any remaining debris from the work area using the towel or newspaper, and store the mining tools for future use.
- Storage: Keep the discovered rocks and minerals in a designated container, box, or display case to protect them from damage and keep them organized.
FAQs
- Where can I purchase a rock mining bucket?
- Rock mining buckets can be found online through various retailers, at local gem and mineral shops, or even at some rock mining attractions.
- Is a rock mining bucket suitable for all ages?
- Rock mining buckets can be enjoyed by children of all ages, although adult supervision is recommended for younger kids to ensure they handle the tools and materials safely.
- What additional materials or tools might be needed for a rock mining bucket activity?
- In addition to the tools provided in the bucket, you may want to have a container or tray to hold the rocks, a towel or newspaper for easy cleanup, and a reference guide or book about rocks and minerals.
- Can I create my own rock mining bucket?
- Absolutely! If you have access to a variety of rocks, minerals, and fossils, you can create your own custom rock mining bucket tailored to your child’s interests and preferences.
-
Product on saleHerkimer Diamond Mining KitOriginal price was: $60.$50Current price is: $50.
-
Product on saleFossil Dig Kit for Beginners | Dig Your Own FossilOriginal price was: $35.$25Current price is: $25.
A rock mining bucket offers a unique and engaging activity that combines hands-on exploration with valuable learning opportunities for children. This step-by-step guide provides a framework for an unforgettable rock mining adventure with your kids, fostering their curiosity, creativity, and knowledge about geology and the natural world. As they sift through the bucket and unearth hidden treasures, they will not only create lasting memories but also develop a deeper appreciation for the beauty and complexity of our planet. So, gather your young geologists, grab a rock mining bucket, and set off on an educational adventure that will inspire and delight the whole family.